Make a cash sale
Use Box Office to sell tickets in person. You need access to the organization's box office and a scheduled event time with tickets available. These steps cover general admission tickets.
Choose the event and tickets
- Open Box Office in the organizer workspace.
- Choose the Event, then Event Time. Check the date, time, and venue.
- Select Open Box Office.
- Set the quantity beside the admission category and price tier you want.
- On a phone, select Review Order first. Select Cash to open Complete Sale.
Check the customer and cash received
Select an existing customer
If the customer already has a profile, open Customer profile (Optional) in Complete Sale. Search by name, email, or phone and select the matching customer. Check their details before continuing. The completed order is added to that customer's existing history.
Any applicable customer alerts appear with the selected profile. Read these before completing the sale. If you selected the wrong person, use Clear selected customer, then search again.
Enter contact details manually
On a phone, expand Or enter contact details manually first. Enter Customer Name (Optional) and Confirmation email (Optional) if you want to include the customer's details with the sale. Check the email address carefully.
Record the cash received
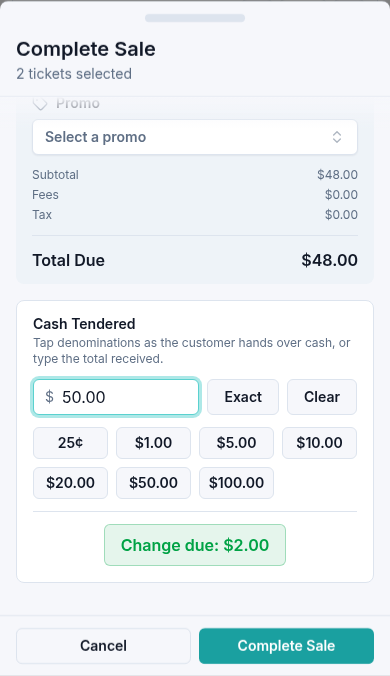
Review the tickets and Total Due. Under Cash Tendered, enter the amount the customer gives you. Exact fills in the total due when they pay the exact amount. The calculator shows No change or the Change due.
For example, two $24 tickets total $48. If the customer hands over $50, enter $50 and return the $2 change shown.
Complete the sale
After checking the tickets, total, and cash, select Complete Sale. Wait for Sale Complete and check the number of tickets processed and order reference.
Select Print Receipt to open the receipt in a separate tab for printing. The receipt includes the customer name entered for the sale. You can also find the order later using its reference.
If completion fails, read the message and check whether an order was created before starting another sale. Include the event time, order reference if one was created, and exact message when contacting support.
Check in attendees
If the customer is arriving now and you have permission to check in attendees, use the controls in Sale Complete:
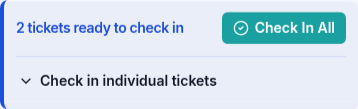
- Check the number of tickets ready to check in.
- For a group that has all arrived, select Check In All.
- For part of a group, expand Check in individual tickets, match each attendee's ticket code, and select Check In beside that ticket.
- Check the updated count before closing the confirmation.
Use Undo All or an individual ticket's Undo to correct an accidental check-in. This changes attendance, not the booking or payment.
After closing the confirmation, use the attendee check-in screen to find the booking and manage attendance.
If a check-in update fails, check the current ticket status before trying again. Contact Us with the event time, order reference, and message if you need help.