Mark accessible and obstructed-view seats
Use seat properties to record which positions are accessible or have an obstructed view. You need permission to manage venues. Confirm the physical layout and access arrangements with the venue before marking seats.
Set a seat's properties
- Open Venues & Seat Maps and select the venue's latest seat map.
- Use Toggle structure panel in the map toolbar to hide the panel if it covers the seats. Use the Select tool to select a seat.
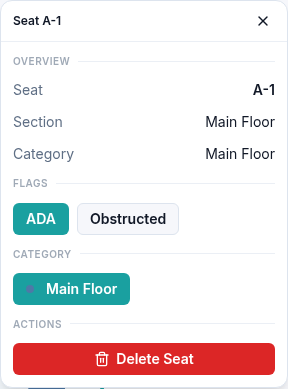
- Check the seat, row, and section in its details panel.
- Select ADA to mark an accessible position, or Obstructed to mark a restricted view. The selected button is highlighted. Select it again to remove that property.
- Select Save, then reopen the new version and check the seat.
For example, the first seat in the front row could be an accessible position, while a different seat has a view partly blocked by a pillar. Record the venue's actual arrangement rather than applying a property to an entire area without checking individual seats.
Recover a deleted seat
Delete Seat removes the selected seat from the layout. If this was a mistake, use Undo in the map toolbar before leaving the editor. The restored seat keeps its properties. Redo reapplies the deletion; use Undo again if you want to keep the seat, then Save.
To change the number or numbering of seats across a row, see adjust rows in a venue seat map.
Check which layout you are changing
Saving creates a new venue-map version. It does not automatically change the seating layout already saved for an existing event time. Review the layout when setting up a reserved-seating event.
If a property will not save or the wrong seat changes, include the venue, map version, section, row, and seat when you contact support.