Customer follow-up tasks
Use Follow-Up to record work that your team needs to complete for a customer. You need access to customer records and support features.
Create and assign a task
- Find and open the customer.
- Select Follow-Up, then Add Task beside Open Tasks.
- Enter a Task title describing the action. Add Task details with the information the person doing it will need.
- Choose Priority: Normal or Urgent.
- If the task has a deadline, enter the Due at date and time. Check the displayed Timezone before saving.
- Under Assignee, select the staff member responsible.
- Select Save Task. Check that the task appears in Open Tasks.
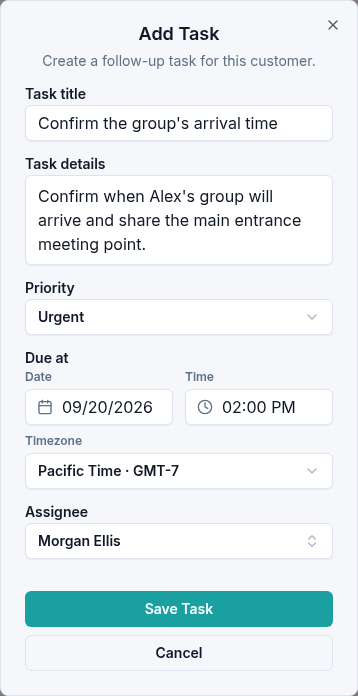
For example, assign someone to confirm a group's arrival time and share the meeting point before the event.
Update or complete the task
Open Task actions (the three-dot menu) beside the task. Select Edit to update its details or priority, then Save Changes. To remove the current assignment, choose Unassigned under Assignee. To remove a deadline, clear both the Due at date and time, then save. Reopen the task to check that the assignment or deadline has been removed.
When the work is finished, select Complete. It leaves Open Tasks and appears in Task History.
If a completed task needs more work, expand Task History using Show completed and archived tasks. Open Completed task actions beside the task and select Reopen. It returns to Open Tasks.
Archive or restore a task
For a task that should leave the active list, select Archive from Task actions, then confirm Archive in Archive Task. The task stays in history.
To restore it, expand Task History, open Archived task actions beside the task, and select Restore. Check that it appears in Open Tasks again.
If saving fails, check the title and any date or time entered. Reopen the profile to confirm the current state before repeating an action. Include the customer name, task title, and exact message when contacting support.