Connect custom domains
Custom domains let customers use your own address for your Eventyr pages and branded email. You need access to your organization's settings, Brand Essentials, and someone who can update DNS records for the domains you choose.
Choose your domains
- Open Settings, then Domains.
- Enter the hostname you want customers to visit in Public web host.
Enter the hostname alone, without
https://or a page path. - In Email base selection, keep Same as public web host, or choose Advanced custom email base and enter a separate Email base domain.
- Review Derived email hosts. Eventyr shows the
notify,support, andupdatesaddresses that will use your email base. - Select Start domain setup.
For example, a group could use a ticketing subdomain for its public pages and its main domain as the email base. Use domains your organization controls; the example addresses in this guide are not records to copy.
Follow the verification instructions
The Domain onboarding page groups the required records into Verify ownership, Public web domain setup, and Email domain setup.
- Give the ownership TXT records to the person managing your DNS. Copy the Host / Name and Value / Target exactly as shown.
- After those records are saved, select Check again.
- Wait for Ownership verified. Eventyr then prepares the remaining website and email records.
- Add the remaining records shown on the page and select Check again.
- Wait for Active domains, then review Current domains and Branded email subdomains.
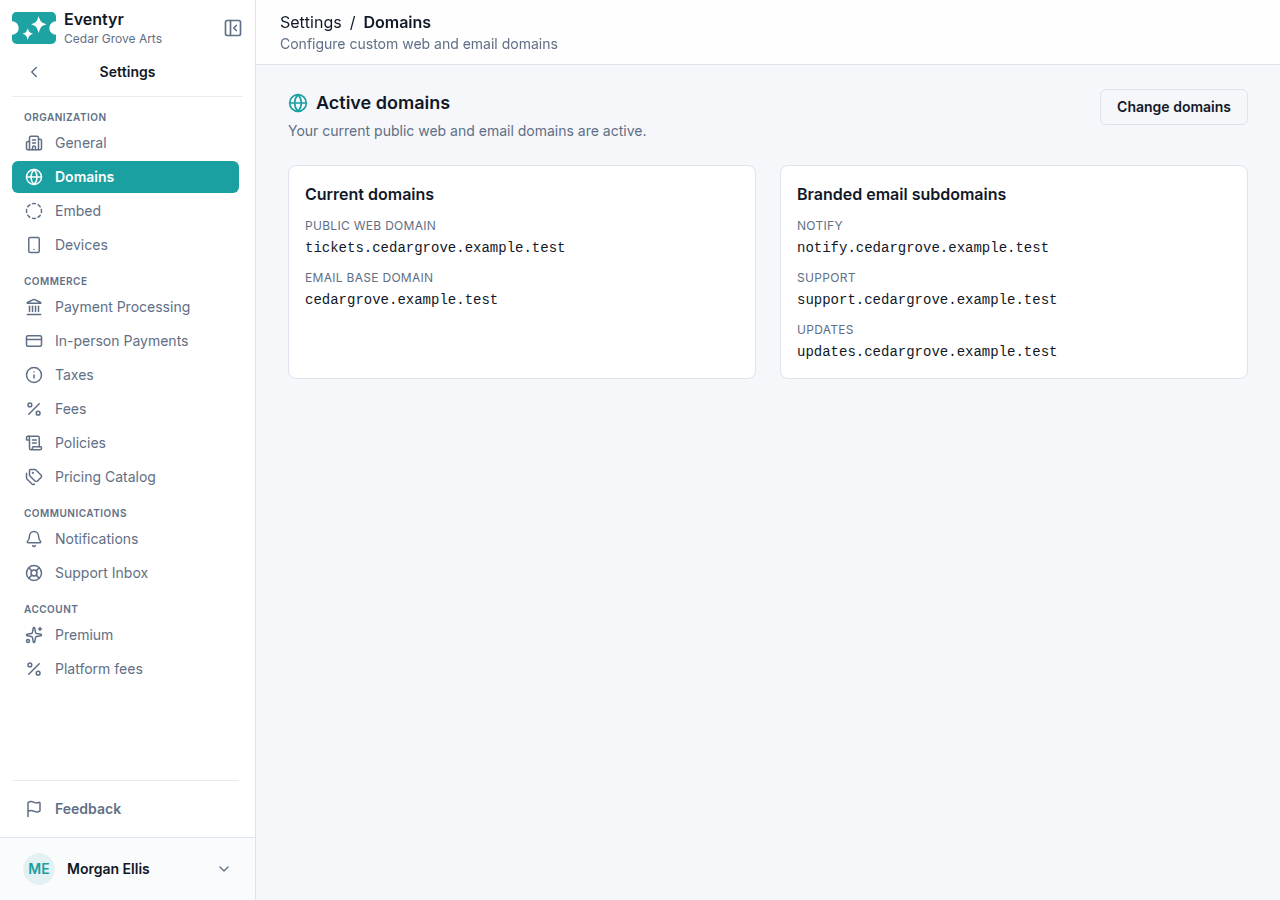
Pending ownership or incomplete records do not activate the new domains. If the page is preparing records, allow it to finish. If a check still reports missing records, ask your DNS administrator to compare the record types, names, and values with the current instructions. Contact support with the domain name and message shown if you cannot resolve the check.
Replace domains that are already active
Select Change domains, enter the new choices, and select Start domain setup. The page becomes Replacement domain onboarding and shows the existing configuration under Currently live.
The existing domains stay active while the replacement is being verified. Follow the new instructions; an earlier setup's ownership values are not a substitute for the current ones.
Cancel an unfinished replacement
- On Replacement domain onboarding, select Cancel.
- In Cancel domain onboarding?, select Keep onboarding to continue setup, or Cancel onboarding to discard the replacement.
- After cancellation, check Active domains. Your previous domains remain in place.
Canceling a replacement does not remove the currently active configuration.